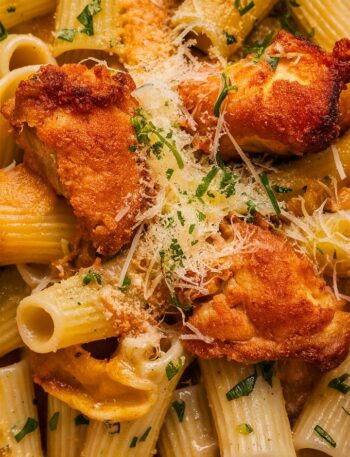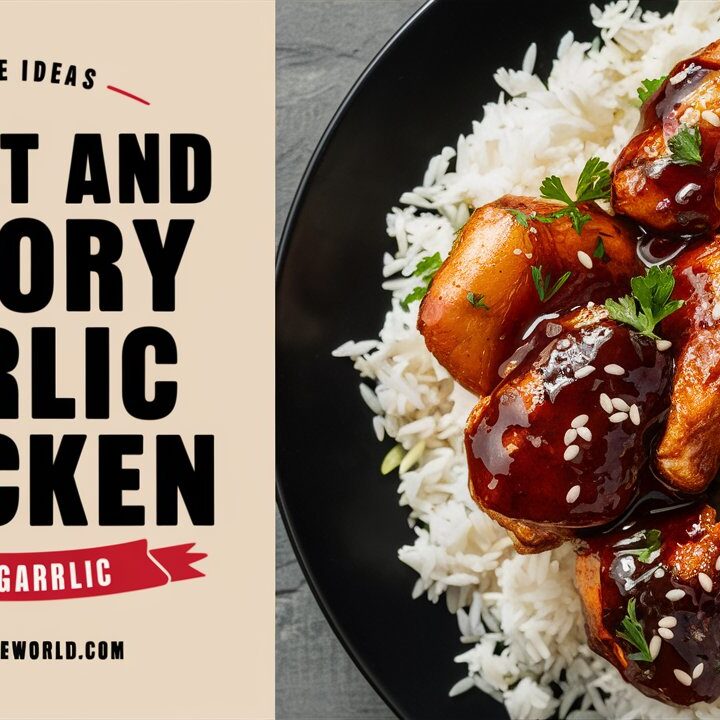
There’s something universally comforting about crispy, golden chicken coated in a sticky-sweet, garlicky glaze. This Crispy Honey Garlic Chicken – Easy Weeknight Recipe delivers just that—and more. Designed to satisfy your craving for flavor-packed takeout, this dish is made with real, pantry-friendly ingredients and comes together in under 30 minutes. It’s perfect for home cooks who want restaurant-style results without all the complexity or mess.
Whether you’re making dinner for the whole family or just looking for a quick fix for one, this recipe fits beautifully into any busy lifestyle. Let’s dig into what makes this dish one of the best chicken meals you’ll ever try.
2. Why You’ll Love This Recipe
- ✅ Ready in 30 minutes
- ✅ Crispy outside, tender inside
- ✅ Sweet and savory garlic glaze
- ✅ Uses common kitchen ingredients
- ✅ Perfect for weeknights or meal prep
- ✅ Kid-friendly, but customizable for spice lovers
- ✅ Adaptable for gluten-free or low-carb diets
This isn’t just another chicken recipe—it’s a crave-worthy classic you’ll want to repeat week after week.
3. The Story Behind the Dish
Inspired by Asian-American fusion cooking, this crispy chicken dish takes its cue from beloved takeout flavors but reinvents them with simplicity. Elena, from Elena Cooks, was determined to create a version of honey garlic chicken that tasted indulgent but could be made in any home kitchen.
Her mission? Deliver bold flavor with easy techniques, without resorting to bottled sauces or deep-frying nightmares. The result is this masterpiece: crispy chicken bites coated in a sticky, savory-sweet garlic glaze you can’t stop eating.
4. What Makes It Perfect for Weeknights
Let’s face it—weeknights are hectic. Between work, errands, and everything else, we often resort to takeout or boring frozen dinners. This recipe solves that problem with:
- Minimal prep: Just 10 minutes of chopping and coating.
- Quick cook time: Chicken cooks fast when cut into small pieces.
- One-pan sauce: Less cleanup, more flavor.
- Versatile serving options: Pairs with rice, noodles, or even salad.
Even on your busiest night, this meal is doable—and delicious.
5. Ingredients Breakdown
Here’s everything you need to make this dish from scratch:
For the Chicken:
- 2 boneless, skinless chicken breasts, cut into bite-sized chunks
- ½ tsp salt and ½ tsp black pepper
- ½ cup cornstarch (for coating)
- 2 large eggs, beaten
- Vegetable oil, for frying
For the Honey Garlic Sauce:
- 1 tablespoon garlic, finely minced
- ¼ cup honey
- 2 tablespoons soy sauce (low sodium recommended)
- 1 tablespoon rice vinegar
- 1 tablespoon water
- ½ teaspoon sesame oil
- 1 teaspoon cornstarch mixed with 1 tbsp water (slurry)
Optional Garnish:
- Sesame seeds
- Sliced green onions
- Red chili flakes (for spice lovers)
💡 Pro Tip: You can swap soy sauce for tamari if gluten-free, or use agave in place of honey for a vegan twist.
6. Step-by-Step Instructions (with Expert Tips)
🔹 Step 1: Prepare the Chicken
- Pat chicken pieces dry with a paper towel.
- Season with salt and pepper.
- Dredge each piece in cornstarch, then dip into the beaten egg.
🔥 Elena’s Tip: Patting dry is crucial—moisture makes the coating soggy.
🔹 Step 2: Fry to Crispy Perfection
- Heat vegetable oil (about 2 inches deep) in a skillet over medium-high.
- When hot (350°F), add chicken in batches—don’t crowd the pan.
- Fry 3–4 minutes per side until golden brown.
- Drain on paper towels.
👩🍳 Double-fry for extra crunch! Let pieces rest, then fry again for 1–2 minutes.
🔹 Step 3: Make the Sauce
- In a clean pan, sauté garlic in a touch of oil until fragrant.
- Add honey, soy sauce, vinegar, water, and sesame oil.
- Bring to a simmer.
- Add the cornstarch slurry and stir until thickened (2–3 minutes).
🔹 Step 4: Coat and Serve
- Toss fried chicken in the sauce until fully coated.
- Garnish with sesame seeds and scallions.
- Serve hot over rice or noodles.
7. Customization Ideas
Don’t let the base recipe limit your creativity:
- 🔥 Add spice: Stir in chili garlic sauce or sriracha.
- 🥦 Add vegetables: Toss in steamed broccoli or snap peas.
- 🍋 Brighten it: A splash of lemon juice adds acidity.
- 🧊 Air-fry instead of pan-fry: Lower-fat, still crispy.
- 🐟 Try it with shrimp or tofu: Same method, different protein.
8. Serving Suggestions and Pairings
This chicken pairs beautifully with:
- Jasmine or basmati rice
- Garlic noodles
- Stir-fried veggies
- Asian slaw
- Cucumber salad
- Kimchi or pickled radish (for contrast)
🥢 Want a full meal? Add miso soup or crispy spring rolls on the side.
9. Storage, Reheating & Leftover Ideas
🔸 Storage:
- Store leftovers in an airtight container in the fridge for up to 3 days.
🔸 Reheating:
- Oven or air fryer: Reheat at 375°F for 5–8 minutes.
- Microwave: Use only for sauce-based pieces—may lose crisp.
🔸 Leftover Remix Ideas:
- Honey garlic chicken wraps
- Asian chicken tacos
- Rice bowls with veggies
- Add to ramen or soba noodles
10. Air Fryer Version
Prefer a lighter version? Try this:
- Coat chicken as usual.
- Spray lightly with oil.
- Air fry at 400°F for 10–12 minutes, flipping halfway.
- Toss in sauce and serve.
💡 Air fryer keeps it crisp with less mess and fewer calories.
11. Nutritional Breakdown (Per Serving)
| Nutrient | Amount (Approx.) |
|---|---|
| Calories | 460 |
| Protein | 32g |
| Carbohydrates | 38g |
| Sugars | 14g |
| Fat | 22g |
| Saturated Fat | 3g |
| Sodium | 680mg |
Values may vary based on exact ingredients and quantities used.
12. Cooking Tips from Elena at Elena Cooks
- Always preheat your oil. Undercooked chicken or soggy breading = cold oil.
- Don’t skip the slurry. It’s what gives the sauce that glossy, thick texture.
- Use a wire rack. Instead of paper towels, place fried chicken on a rack to stay crisp.
- Cut chicken evenly. Uniform sizes cook evenly and look better when served.
- Make ahead: The sauce keeps in the fridge for 1 week!
13. Reader FAQs
Q: Can I make this gluten-free?
Yes! Use tamari or coconut aminos instead of soy sauce and gluten-free cornstarch.
Q: Can I use chicken thighs?
Absolutely. Boneless, skinless thighs are juicier and work great here.
Q: Can I bake this?
Yes, but you won’t get the same crispiness. Bake at 425°F for 20 minutes, flipping halfway.
14. Final Thoughts
This Crispy Honey Garlic Chicken is more than just a meal—it’s a weeknight hero. In just 30 minutes, you can create a flavorful, crispy, sticky-sweet dish that’s sure to win over even the pickiest eaters. Easy enough for a Monday night, impressive enough for guests—this recipe is a true keeper.
15. Printable Recipe Card
Coming soon (for your blog export version). Would you like me to create a downloadable/printable version in PDF or HTML?