Cake pops have completely revolutionized the way we think about cake. These bite-sized delights bring the joy of a full-sized cake into a compact, portable, and irresistibly charming form. Whether you’re baking for a kid’s birthday party, a holiday event, a baby shower, or just satisfying your sweet tooth on a weeknight—cake pops made with cake mix are your secret weapon.
They look fancy, taste indulgent, and are endlessly customizable. But here’s the best part: they’re surprisingly easy to make. And when you start with a box of cake mix, the process becomes fail-proof—perfect for beginners and pros alike.
In this comprehensive guide, you’ll discover how to make cake pops from cake mix that look like they came from a bakery, taste like childhood memories, and impress every guest without breaking a sweat. This isn’t just a recipe—it’s a full tutorial built to help you succeed.
🍡 1. What Are Cake Pops?
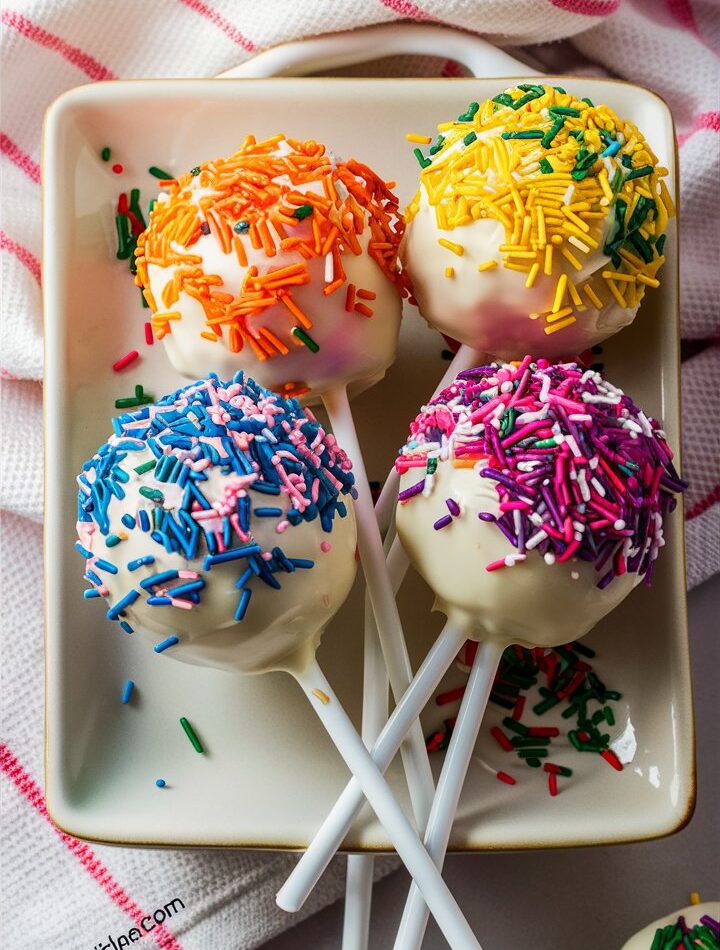
Cake pops are crumbled cake combined with frosting, rolled into balls, and dipped in a candy coating or chocolate shell—then served on a stick like a lollipop. Think of them as a cross between a cupcake and a truffle, only cuter and easier to serve.
They became popular thanks to their decorative appeal, customizability, and the fact that they’re the perfect single-serving dessert. No fork. No plate. No crumbs. Just pop and enjoy.
🧁 2. Why Use Cake Mix?
You can make cake from scratch, but unless you’re a professional pastry chef with extra time, cake mix is your best friend. Here’s why:
- ✅ Time-Saving: Bake and cool in under an hour.
- ✅ Reliable Results: Cake mix gives you consistent texture and flavor.
- ✅ Flavor Options: Endless choices—chocolate, red velvet, lemon, strawberry, funfetti.
- ✅ Beginner-Friendly: No need to master ratios or sifting flour.
With cake mix, your focus can shift from baking to shaping, decorating, and presenting—the fun part.
🛒 3. Ingredients & Tools You’ll Need
Let’s keep it simple. You’ll need:
🧂 Basic Ingredients:
- 1 box of cake mix (any flavor)
- Eggs, oil, water – as listed on box instructions
- 1 cup of frosting – store-bought or homemade
- Candy melts or chocolate chips – for coating
- Sprinkles, toppings, crushed nuts, coconut flakes (optional)
- Lollipop sticks – or food-safe straws
🧰 Helpful Tools:
- Mixing bowls
- Baking pan
- Cookie scoop or spoon
- Parchment paper
- Microwave-safe bowls
- Foam block or cake pop stand
👩🍳 4. Step-by-Step Cake Pop Recipe (Foolproof Method)
Step 1: Bake the Cake
Prepare the cake using the box instructions. Bake in a 9×13″ pan and let it cool completely. Warm cake will turn mushy when mixed.
Step 2: Crumble the Cake
Once cool, break the cake into crumbs using your hands or a fork. You want fine, sand-like crumbs.
Step 3: Add Frosting
Start with ½ cup of frosting. Mix it into the cake crumbs gradually. The texture should resemble playdough—it should hold its shape without sticking to your hands.
Step 4: Roll into Balls
Use a tablespoon or small scoop to portion the mixture. Roll into 1-inch balls and place on a parchment-lined baking sheet.
Step 5: Chill
Refrigerate for 1 hour or freeze for 20 minutes. This helps the balls firm up before dipping.
Step 6: Insert the Sticks
Dip each stick ½ inch into melted candy coating, then insert it halfway into a chilled cake ball. Let it set for a few minutes.
Step 7: Dip the Cake Pops
Dip each cake pop straight down into the melted coating. Tap off excess by gently rotating—don’t swirl.
Step 8: Decorate
While still wet, roll or sprinkle with toppings. Let dry upright in a foam block.
Step 9: Serve or Store
Once fully hardened, your cake pops are ready to eat, gift, or sell.
⚠️ 5. Common Mistakes and How to Avoid Them
| Mistake | Solution |
|---|---|
| Cake balls falling off sticks | Don’t skip the pre-dip stick seal; chill properly. |
| Cracked coating | Let balls warm slightly before dipping. Avoid overheating chocolate. |
| Soft/mushy pops | You’ve added too much frosting. Start small and test texture. |
| Coating too thick | Thin chocolate with coconut oil or shortening. Stir well. |
🍓 6. Creative Flavor Ideas & Add-ins
Here’s where it gets fun. Mix and match cake, frosting, and coating flavors to make unique combinations.
🔄 Cake + Frosting Combos:
- Chocolate cake + cream cheese frosting
- Red velvet cake + vanilla frosting
- Lemon cake + strawberry frosting
- Carrot cake + orange zest frosting
- Vanilla cake + Nutella swirl frosting
💎 Add-ins for Extra Texture:
- Crushed Oreos
- Mini chocolate chips
- Toasted coconut
- Chopped nuts
- Marshmallow bits
🖌️ 7. Decorating Cake Pops Like a Pro
You don’t need to be an artist. Here are foolproof decorating ideas:
- Classic Sprinkles – timeless and fun
- Drizzled Chocolate – melt contrasting chocolate and drizzle using a fork
- Edible Glitter or Gold Dust – for weddings or formal events
- Colorful Candy Melts – pastel for baby showers, bold for birthdays
- Edible Stickers or Shapes – press on after drying
🎨 Pro Tip: Use gel food coloring in candy melts—not water-based dye, which causes seizing.
🧊 8. How to Store and Freeze Cake Pops
At Room Temperature:
- Up to 3 days in a cool, dry spot
In the Fridge:
- Up to 7 days in an airtight container
- Best when individually wrapped
In the Freezer:
- Up to 2 months
- Wrap each pop tightly in plastic and place in a freezer bag
- Thaw at room temperature (not in fridge) to prevent condensation
⏳ 9. Make-Ahead Tips for Busy Bakers
Cake pops are ideal for prepping in stages:
- Day 1: Bake and crumble the cake
- Day 2: Mix, roll, and chill the cake balls
- Day 3: Dip, decorate, and serve
You can also freeze uncoated balls weeks in advance, saving major time for events.
🍬 10. Cake Pop Nutrition (Approximate per pop)
- Calories: 130–160
- Sugar: 10–14g
- Fat: 6–8g
- Protein: 1–2g
- Carbs: 15–20g
These are portion-controlled desserts, making them a great option when you want a sweet treat without overindulging.
🎉 11. Fun Occasions to Serve Cake Pops
- 🎂 Birthday Parties
- 🍼 Baby Showers
- 👰 Bridal Events
- 🏫 School Functions or Bake Sales
- 💼 Corporate Events
- 🎄 Holidays (Easter, Christmas, Halloween)
- 💌 Valentine’s Day Gifts
- 📸 Instagram-Worthy Dessert Tables
🎁 12. Wrapping, Gifting & Selling Cake Pops
🎀 Gifting:
- Wrap each in a clear bag with ribbon
- Add custom tags for personal flair
- Place in decorative mugs or boxes
💸 Selling:
- Offer seasonal themes (e.g., Christmas pops)
- Bundle in packs of 6 or 12
- Brand with a custom logo or sticker
- Use social media to promote your creations
🧁 Display:
- Foam blocks covered with tissue paper
- Cake pop stands
- Glass jars with sugar as a base
🍽️ 13. Bonus: Easy Cake Mix Recipes You’ll Love
Once you fall in love with cake mix, try these easy hits:
- Cinnamon Roll Cake with Vanilla Glaze
- Lemon Loaf with Citrus Icing
- 4-Ingredient Pound Cake
- Strawberry Cream Cheese Bars
- Moist Chocolate Sheet Cake with Whipped Frosting
Each of these recipes takes the convenience of cake mix and turns it into something you’ll want to make again and again.
✅ 14. Final Thoughts
Cake pops made with cake mix are a win in every way: budget-friendly, beginner-friendly, and absolutely adorable. Whether you’re baking for fun or profit, this guide has given you the tools to make cake pops that look great, taste even better, and store beautifully.
This isn’t just a recipe—it’s a complete blueprint. You now know how to bake, crumble, shape, chill, dip, decorate, store, freeze, serve, and even sell cake pops. You’re no longer just a home baker—you’re a cake pop pro.