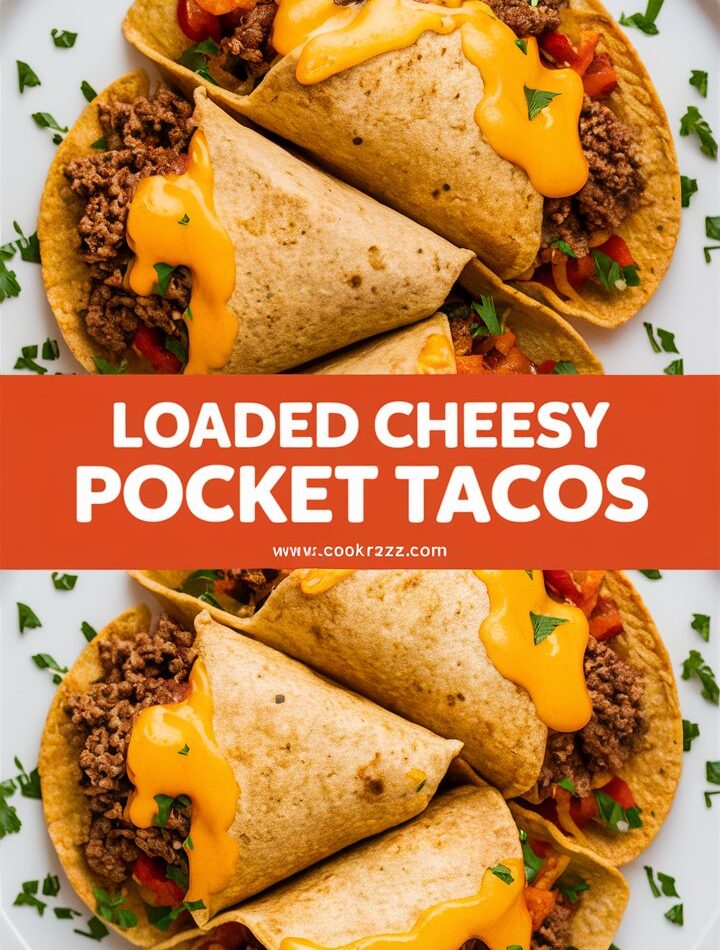
Few dishes hit the sweet spot between comfort, speed, and flavor like tacos do. But what if you could take that experience to the next level? Imagine biting into a golden, crispy tortilla stuffed to the brim with seasoned ground beef and gooey melted cheese, all folded into a neat, handheld pocket.
This is what we call the Loaded Cheesy Pocket Taco — your new go-to weeknight dinner, party appetizer, or even midnight craving companion.
In this ultimate guide, we’ll cover everything you need to make them: from the simplest step-by-step recipe to pro tips, freezing hacks, serving ideas, and creative twists to make them your own. Whether you’re feeding a busy family, cooking solo, or trying to impress friends at a game night, these pocket tacos are guaranteed to disappear fast.
1. Why You’ll Love These Loaded Cheesy Pocket Tacos
What makes this recipe more than just another taco night?
✅ Speed & simplicity: From fridge to table in under 30 minutes, using mostly pantry staples.
✅ Crunch meets melt: Golden toasted tortillas outside, gooey cheese inside.
✅ Customizable: Pick your cheese, protein, toppings, and spice level.
✅ Kid-approved: The neat pocket shape makes them easy (and fun) to eat.
✅ Freezer-friendly: Double the batch and freeze for future lazy days.
Cooking should feel rewarding, not overwhelming — and these tacos deliver big on flavor without adding stress to your week.
2. Key Ingredients & What Makes Them Special
Each ingredient in this recipe isn’t just for taste — it has a role in texture, flavor, and convenience.
Ground Beef (1 lb):
The classic filling choice, juicy and quick to brown. Use 80/20 for more flavor, or go leaner if you prefer.
Taco Seasoning (1 packet):
Adds instant depth. You can use homemade (cumin, chili powder, garlic powder, paprika, oregano) or store-bought for speed.
Shredded Cheddar & Monterey Jack (1 cup each):
Cheddar brings sharp, tangy richness; Monterey Jack melts beautifully and adds creamy pull.
Flour Tortillas (8 small):
The soft taco size folds perfectly into pockets. Choose your favorite brand or go homemade if you’re feeling fancy.
Olive Oil (1 tbsp):
A light brush before baking turns tortillas golden and crisp without frying.
Sour Cream & Salsa (½ cup each):
For dipping, drizzling, or spooning inside. Pick smoky, spicy, or chunky salsa to match your mood.
Optional toppings:
Jalapeños, shredded lettuce, diced tomatoes, avocado slices — or anything your fridge surprises you with.
Tip: A small spoonful of cream cheese inside each pocket makes them extra creamy.
3. How to Make Loaded Cheesy Pocket Tacos: Step-by-Step
This recipe keeps things relaxed — no deep frying, fancy equipment, or long marinating needed.
Step 1: Preheat the oven
Heat to 375°F (190°C). This gives your tortillas the perfect golden crunch.
Step 2: Cook the beef
- In a skillet over medium heat, add the ground beef.
- Break it apart with a spoon; cook until browned (about 6–8 minutes).
- Drain excess grease if you like.
- Add taco seasoning + ¼ cup water.
- Simmer for 2–3 minutes until thickened and fragrant.
Step 3: Assemble the tacos
- Lay tortillas flat.
- Spoon a generous line of beef slightly off-center.
- Sprinkle cheddar and Monterey Jack evenly over the beef.
- Add any optional toppings (jalapeños, tomatoes).
Step 4: Fold into pockets
- Fold each side inward, then roll up from the bottom to form a sealed pocket or envelope.
- Press gently to hold shape.
Step 5: Brush & bake
- Place tacos seam-side down on a baking sheet lined with parchment.
- Brush tops lightly with olive oil.
- Bake for 10–12 minutes, until golden and cheese is melted.
Step 6: Serve & enjoy
- Let cool slightly so cheese sets.
- Serve hot with sour cream, salsa, or your favorite dips.
That’s it — weeknight comfort food, made simple.
4. Tips & Tricks for the Best Cheesy Pocket Tacos
✅ Warm tortillas first
Microwave for 10–15 seconds wrapped in a damp paper towel. They’ll fold without cracking.
✅ Don’t overfill
It’s tempting, but too much filling makes them burst. Save extras to sprinkle on top.
✅ Seal the edges
Press edges gently or use a tiny bit of water to help them stick.
✅ Get creative with cheese
Pepper Jack for spice, mozzarella for extra melt, or smoked gouda for a twist.
✅ Batch baking?
Use two trays, rotate halfway so every taco crisps evenly.
5. Make-Ahead, Freezing & Reheating Instructions
These tacos are weeknight heroes because they store and reheat beautifully.
Make ahead
- Cook the beef mixture up to 2 days in advance; store in the fridge.
- When ready, assemble and bake fresh.
Freeze (before baking)
- Assemble tacos, place on a tray, and freeze until solid.
- Transfer to a zip-top bag; keep up to 2 months.
- Bake straight from frozen at 375°F for about 18–20 minutes.
Reheat leftovers
- Oven or air fryer: 350°F for 5–8 minutes (best for crispiness).
- Microwave: 60–90 seconds (soft tortilla, still tasty).
6. Fun Variations & Creative Twists
Protein swaps
- Shredded rotisserie chicken with buffalo sauce
- Seasoned ground turkey or plant-based crumbles
- Pulled pork + BBQ sauce for a smoky flavor
Add-ins
- Cream cheese or refried beans inside
- Black beans or corn for extra texture
- Hot sauce, chipotle mayo, or lime crema drizzle
Spicy kick
- Add diced jalapeños or chipotle peppers to beef
- Swap cheddar for pepper jack
Breakfast version
- Scrambled eggs, cheese, and cooked chorizo
- Serve with salsa verde
The basic method stays the same — just mix, fold, and bake.
7. Serving Suggestions & Side Dishes
Pair your pocket tacos with:
- Mexican rice or cilantro-lime rice
- Refried beans or black beans
- Guacamole & chips
- Simple salad with lime vinaigrette
- Grilled corn on the cob
For drinks: try agua fresca, iced tea, or a cold soda.
8. Nutrition Information (Approximate, per taco)
| Calories | Protein | Fat | Carbs | Fiber | Sodium |
|---|---|---|---|---|---|
| 376 | 17g | 21g | 27g | 2g | 614mg |
Note: Values vary with toppings, tortilla brand, and cheese type.
9. Frequently Asked Questions
Can I fry instead of bake?
Yes! Shallow fry in hot oil until golden (about 2–3 minutes per side). Drain on paper towels.
Can I make them gluten-free?
Use gluten-free tortillas; check that your taco seasoning is certified gluten-free.
Are they spicy?
Not unless you add spicy toppings. Keep plain for kids.
How long do leftovers last?
Up to 3–4 days refrigerated; 2 months frozen.
10. Conclusion: Why This Easy Cheesy Taco Recipe Belongs in Your Weekly Rotation
Life is busy, dinner shouldn’t be complicated. These Loaded Cheesy Pocket Tacos prove that you can have a crispy, cheesy, comforting meal on the table in under half an hour — and still taste like something special.
They’re family-friendly, freezer-friendly, endlessly customizable, and most importantly: unbelievably delicious.
So next time the day feels too short, your fridge looks too empty, or you simply crave something cheesy and warm — remember this recipe.
Fold, bake, dip, and enjoy.
Your weeknight just got an upgrade.