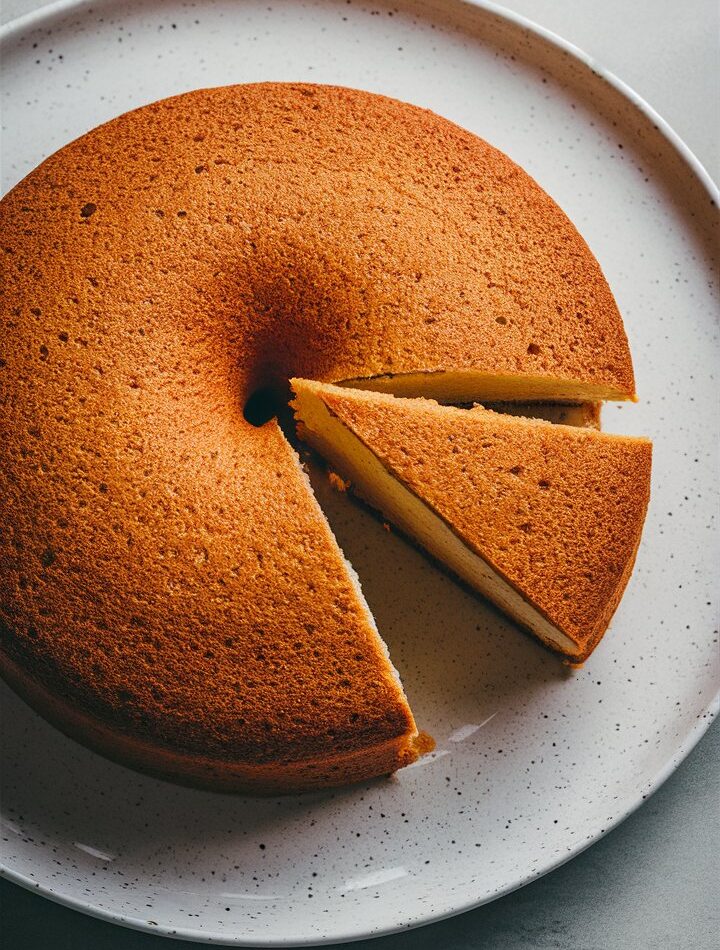
There’s something timeless about a vanilla sponge cake. It’s the kind of recipe every baker—new or experienced—should master. This cake is light, fluffy, and has just the right amount of sweetness. It forms the foundation of countless desserts: trifles, birthday cakes, cupcakes, or just a plain slice with tea. And the best part? You don’t need fancy ingredients or techniques—just simple pantry staples, a little patience, and the right method.
In this detailed, professional-level guide, you’ll not only learn how to make the perfect vanilla sponge cake, but you’ll also understand the science behind it. Whether you’re baking at midnight or prepping for a special celebration, this cake will not disappoint.
2. Why You’ll Love This Cake
✔️ Soft and airy texture that melts in your mouth
✔️ Made from 7 simple ingredients you already have
✔️ No artificial flavors or additives
✔️ Perfect for layering, frosting, or enjoying plain
✔️ Stays fresh for days with proper storage
✔️ Easy enough for beginners, foolproof for pros
3. What Makes Vanilla Sponge Cake Unique?
Unlike butter cakes or pound cakes, sponge cakes rely on whipped eggs for structure and rise. There’s no oil or creaming involved. The result is a lighter, airier texture that bounces back when touched. The beauty of this cake lies in its versatility—it can absorb syrups, frostings, and fillings without getting soggy or dense.
Key difference:
- Butter Cake: Creamed butter + sugar
- Sponge Cake: Whipped eggs + sugar (no fat until the end)
4. Ingredients Breakdown (And Why They Matter)
Here’s a deep dive into the ingredients and what role each plays in the final cake:
🥚 Eggs (4 large, room temperature)
The backbone of the sponge cake. Eggs provide structure, moisture, and volume. Whipping the eggs with sugar creates the signature sponge texture.
🍬 Sugar (1 cup / 200g)
Not just for sweetness—it stabilizes the whipped eggs and contributes to the cake’s golden color.
🧂 Salt (¼ tsp)
A small but powerful ingredient that enhances flavor. Never skip it.
🌾 All-Purpose Flour (1 cup / 120g)
Flour gives the cake body. Sift it well to avoid lumps and ensure even mixing.
🥄 Baking Powder (1 tsp)
Gives the cake a gentle rise, though most of the lift comes from the whipped eggs.
🧈 Butter (¼ cup / 60g)
Melted with warm milk, this adds richness and a tender crumb.
🥛 Milk (½ cup / 120ml)
Warm milk helps incorporate the butter and gives the batter a smooth finish.
🍦 Vanilla Extract (1 tsp)
Gives the cake its classic aroma. Use pure vanilla for best results.
5. Equipment You’ll Need
- 8-inch round cake pan
- Parchment paper
- Electric hand or stand mixer
- Mixing bowls (glass or metal preferred)
- Rubber spatula
- Fine mesh sieve (for sifting flour)
- Small saucepan (to warm milk and butter)
- Wire rack (for cooling)
6. Step-by-Step Instructions
Let’s bake a cake that’s soft, fluffy, and dependable every time:
Step 1: Preheat and Prepare
- Preheat oven to 350°F (175°C).
- Line the bottom of your cake pan with parchment paper. Grease the sides lightly with butter.
Step 2: Whip Eggs and Sugar
- In a large bowl, beat 4 eggs and 1 cup sugar on high speed for 7–9 minutes.
- You want a pale, thick batter that leaves ribbons when you lift the beater.
Step 3: Sift and Fold
- Sift flour, baking powder, and salt together.
- Gradually fold into the egg mixture with a spatula.
- Avoid overmixing! You want to keep the air inside.
Step 4: Warm the Milk and Butter
- In a small saucepan, heat milk and butter until butter melts.
- Turn off heat and stir in vanilla extract.
Step 5: Add Warm Mixture
- Slowly pour the warm mixture into the batter, folding gently.
- The batter will become glossier and smoother.
Step 6: Bake
- Pour batter into the pan and tap gently on the counter to release air bubbles.
- Bake for 30–35 minutes or until golden and a toothpick comes out clean.
Step 7: Cool
- Let the cake rest in the pan for 10 minutes.
- Transfer to a wire rack and cool completely before slicing or frosting.
7. Mastering the Technique
Why Your Sponge Might Fail (and How to Fix It):
| Problem | Cause | Solution |
|---|---|---|
| Flat Cake | Under-whipped eggs | Beat eggs & sugar until thick and ribbony |
| Dense Texture | Overmixed batter | Fold flour gently |
| Sinks in middle | Oven door opened too early | Don’t open before 25 mins |
| Rubber-like texture | Cold eggs or milk | Use room temp eggs, warm milk |
8. Pro Tips for Success
- Use fresh eggs: They whip better and hold air longer.
- Warm your eggs: Place them in warm water for 5–10 mins if they’re cold.
- Don’t rush the whipping: 8 minutes is ideal on high speed.
- Fold, don’t stir: Use a spatula and fold slowly in a circular motion.
- Don’t overbake: Check at 30 mins. If the cake springs back and a toothpick comes out clean, it’s done.
9. Flavor Variations and Add-Ins
You can easily customize the vanilla sponge with these options:
- Lemon zest or orange zest for a citrus twist
- Almond extract in place of vanilla
- Mini chocolate chips or berries for texture
- Cocoa powder (replace ¼ cup of flour) for a chocolate sponge
- Cinnamon or cardamom for subtle spice
10. Best Uses for Vanilla Sponge Cake
- Layer cakes: Stacks beautifully with whipped cream or buttercream
- Tiramisu base: Absorbs coffee syrup perfectly
- Strawberry shortcake: Slice horizontally and fill with cream & berries
- Mini cupcakes: Same batter, smaller pans
11. Frosting Suggestions
Although sponge cake is delicious plain, here are some great frosting options:
- Whipped Cream with fresh fruit
- Vanilla Buttercream for a traditional look
- Chocolate Ganache for richness
- Mascarpone Frosting for a fancier twist
- Cream Cheese Frosting for tangy balance
12. Make It Ahead of Time
- Bake the cake a day early and wrap it tightly in plastic wrap.
- For layered cakes, refrigerate the cake before slicing—firmer texture = cleaner cuts.
- You can freeze sponge cake (unfrosted) for up to 2 months.
13. How to Store Vanilla Sponge Cake
| Storage Type | Method | Shelf Life |
|---|---|---|
| Room Temp | Wrapped in plastic or container | 3 days |
| Refrigerator | Covered, especially if frosted | 5–6 days |
| Freezer | Wrapped in foil + freezer bag | 2 months |
14. Frequently Asked Questions (FAQs)
Q: Can I use cake flour instead of all-purpose?
A: Yes! Cake flour makes the texture even softer. Replace 1 cup AP flour with 1 cup + 2 tbsp cake flour.
Q: Why didn’t my cake rise?
A: Either the eggs weren’t whipped enough, or the batter was overmixed.
Q: Can I double the recipe?
A: Absolutely. Use two 8-inch pans or one 9×13 inch pan for a sheet cake version.
Q: Can I make it dairy-free?
A: Use plant-based milk and vegan butter. Results may vary slightly.
15. Full Vanilla Sponge Cake Recipe (Printable Card)
Prep Time: 20 min
Cook Time: 35 min
Total Time: 55 min
Yield: 12 slices
Ingredients:
- 4 large eggs
- 1 cup (200 g) granulated sugar
- 1 cup (120 g) all-purpose flour (sifted)
- 1 tsp baking powder
- ¼ tsp salt
- ½ cup (120 ml) whole milk
- ¼ cup (60 g) unsalted butter
- 1 tsp vanilla extract
Instructions:
- Preheat oven to 350°F (175°C). Line 8-inch pan with parchment.
- Beat eggs and sugar for 8 minutes until tripled in volume.
- Sift flour, salt, baking powder. Fold into eggs gently.
- Heat milk and butter. Stir in vanilla.
- Fold warm mixture into batter.
- Pour into pan and bake 30–35 mins.
- Cool completely before frosting or slicing.
16. Nutrition (Per Slice)
- Calories: 195
- Fat: 7g
- Saturated Fat: 4g
- Carbs: 28g
- Sugar: 18g
- Protein: 4g
- Fiber: 0.5g
- Sodium: 90mg
- Cholesterol: 70mg
17. Final Thoughts
This vanilla sponge cake recipe is more than just a dessert—it’s a foundation. Once you’ve mastered this, you’ll find yourself using it for celebrations, casual snacking, or just because you feel like baking. It’s simple, elegant, and endlessly adaptable.
No boxed mix can match the flavor, fluffiness, or pride that comes from baking this from scratch. Bookmark it, print it, or stick it on your fridge—this is your new go-to cake.