There are few things as powerful as food when it comes to triggering memories—and among them, the humble school cake stands out. Just one bite of this soft, lightly iced vanilla traybake can take you straight back to the buzzing energy of childhood classrooms, chatter-filled cafeterias, and the excitement of lunchboxes carefully packed by loving hands.
Whether you’re whipping up something sweet for your kids’ lunchbox, hosting a cozy tea party, or simply craving something simple yet satisfying, this classic school cake recipe has you covered. It’s the type of bake that doesn’t rely on trendy ingredients or complicated techniques—it thrives on familiarity, ease, and a touch of fun. Think soft sponge, sweet icing, and cheerful sprinkles.
In this comprehensive guide, we’ll walk through everything you need to make the perfect school cake: from ingredients and step-by-step instructions to pro tips, make-ahead guidance, storage ideas, variations, and even nutrition insights. Ready to bake a bit of joy? Let’s dive in.
1. What Is a School Cake?
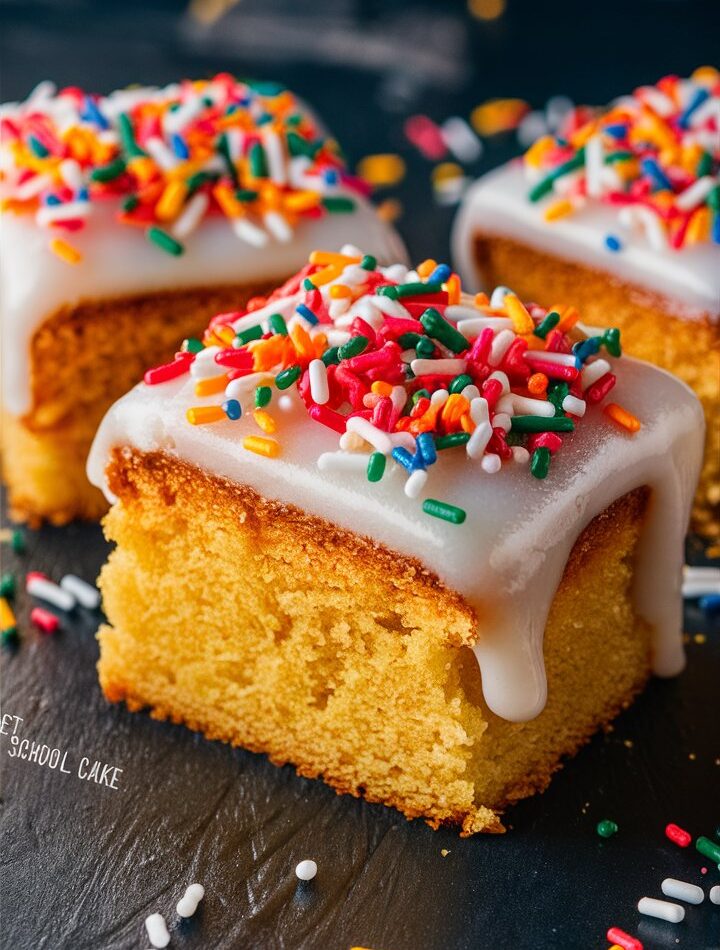
A school cake is a simple traybake-style vanilla sponge, often topped with white icing and colorful sprinkles. Traditionally served in British school cafeterias, this nostalgic treat became a favorite among children for its soft texture and sweet topping.
It’s not fancy or fussy. There are no complex layers, fillings, or extravagant decorations. What you get is a light, airy sponge made with pantry staples like butter, sugar, eggs, flour, and milk—crowned with a glossy icing that sets just enough to create that satisfying bite.
The beauty of school cake lies in its simplicity, comfort, and nostalgic charm.
2. Why Everyone Loves This Cake
✅ It’s Kid-Approved and Adult-Adored
Children love the fun sprinkles and sweet icing, while adults enjoy the nostalgic trip down memory lane. It’s a win-win for all ages.
✅ Perfect for Any Occasion
- School lunchboxes
- Birthday party buffets
- Bake sales
- Picnics
- Tea-time treats
✅ Quick and Easy
With minimal prep and bake time, this recipe is a favorite for busy parents or beginner bakers looking for something foolproof but delicious.
3. Key Ingredients
This recipe uses basic ingredients you likely already have in your kitchen. But each one plays an important role in achieving the perfect texture and flavor.
🧈 Unsalted Butter
Softened to room temperature. Adds richness and moisture to the sponge.
🍚 Caster Sugar
A fine sugar that dissolves easily, giving the cake a delicate crumb and golden crust.
🥚 Eggs
Room temperature for better blending. Help bind the mixture and provide structure.
🍦 Vanilla Extract
Adds that warm, cozy flavor that makes this sponge unmistakably familiar.
🌾 Self-Raising Flour
No need for baking powder—this flour already includes the right amount of leavening agents to give your cake a good rise.
🥛 Milk
Loosens the batter to the right consistency. Just a few tablespoons help create a soft, pourable batter.
🍥 Icing Sugar
Mixed with a bit of water to form a simple white icing.
✨ Sprinkles
Colorful, cheerful, and fun—these give the school cake its signature festive look.
4. Step-by-Step School Cake Recipe
🧁 Yield: 12 Slices
⏱ Prep Time: 15 minutes | Cook Time: 25 minutes | Total Time: 40 minutes
Ingredients:
- 225g unsalted butter (softened)
- 225g caster sugar
- 4 medium eggs (room temperature)
- 2 tsp vanilla extract
- 225g self-raising flour
- 2–3 tbsp milk
- 200g icing sugar
- 2–3 tbsp water
- Sprinkles (rainbow, chocolate, or pastel)
Instructions:
Step 1 – Prep the Oven and Tin
Preheat oven to 180°C (160°C fan/gas mark 4). Line a rectangular traybake tin (approx. 9×13 inches) with parchment paper.
Step 2 – Cream Butter and Sugar
In a large mixing bowl, beat the butter and sugar together until pale and fluffy. Use a stand mixer or electric hand mixer for ease.
Step 3 – Add Eggs One at a Time
Crack in the eggs one by one, mixing well after each addition to prevent the batter from curdling.
Step 4 – Add Vanilla and Fold in Flour
Stir in vanilla extract. Sift the self-raising flour and gently fold it in using a spatula or wooden spoon.
Step 5 – Adjust with Milk
Add milk, one tablespoon at a time, until the batter is soft and drops slowly from the spoon.
Step 6 – Bake the Sponge
Pour the mixture into the tin and level the surface. Bake for 25 minutes, or until golden and springy to touch. A skewer inserted should come out clean.
Step 7 – Cool Completely
Let the cake cool in the tin for 10 minutes before transferring it to a wire rack. Do not ice until completely cool.
Step 8 – Make the Icing
In a small bowl, mix icing sugar with water, a teaspoon at a time, until it forms a thick but spreadable glaze.
Step 9 – Decorate and Slice
Spread the icing over the cooled sponge, then scatter sprinkles liberally over the top. Slice into squares and serve.
5. Expert Baking Tips
- Room temperature ingredients blend more easily and create a smoother batter.
- Don’t overmix once the flour is added—overworking the batter can make the sponge tough.
- Use parchment paper for easy removal and cleaner edges when slicing.
- Cool completely before icing to prevent the glaze from melting and sliding off.
6. Variations to Try
Want to customize your school cake? Here are some fun ideas:
- Lemon School Cake: Add 1 tbsp lemon zest and replace vanilla with lemon extract.
- Jam Layer: Slice the sponge horizontally and spread a thin layer of raspberry or strawberry jam before icing.
- Coconut Topping: After icing, sprinkle with desiccated coconut instead of sprinkles.
- Chocolate School Cake: Replace 50g of flour with cocoa powder and top with chocolate glaze.
7. Make-Ahead and Freezing Tips
You can bake this cake ahead and store it un-iced for up to 3 days at room temperature or freeze it for up to 2 months.
To freeze:
- Cool completely.
- Wrap tightly in cling film and foil.
- Defrost at room temperature overnight.
- Ice and decorate just before serving.
8. How to Store Leftovers
Store leftover school cake in an airtight container at room temperature for up to 3 days.
If your environment is humid or warm, consider refrigerating the cake (without icing) and bringing it to room temp before serving.
9. Serving Ideas and Occasions
This cake is perfect for:
- School lunchboxes
- Birthday parties
- Bake sales
- Casual gatherings
- Tea-time treats
- After-dinner desserts
Serving Tip: Pair with a cup of English breakfast tea, warm milk, or even a scoop of vanilla ice cream.
10. Frequently Asked Questions
Q: Can I make this recipe gluten-free?
Yes! Use a gluten-free self-raising flour blend and add ½ tsp xanthan gum.
Q: Can I use margarine instead of butter?
You can, but real butter gives a better flavor and texture.
Q: Why did my cake sink in the middle?
Likely causes: underbaking, opening the oven too early, or too much liquid. Stick to the recipe’s proportions and timing.
Q: Can I make this recipe vegan?
Use plant-based margarine, egg replacer (like aquafaba or flaxseed), and non-dairy milk. The texture will change slightly but still be tasty.
11. Nutrition Facts (Per Slice)
| Nutrient | Amount |
|---|---|
| Calories | 270 kcal |
| Sugar | 25g |
| Fat | 12g |
| Saturated Fat | 7g |
| Carbohydrates | 38g |
| Fiber | 0.5g |
| Protein | 3g |
| Sodium | 55mg |
Based on 12 servings. These are approximate values.
12. Try These Sweet Easy Recipes Next
Looking for more comforting treats? Don’t miss these reader favorites:
- 🍰 Ooey Gooey Cinnamon Roll Cake – A Cozy Favorite
- 🍫 Coffee Chocolate Cake Recipe – Moist & Rich
- 🎂 Ina Garten Yellow Cake – Bakery-Style Perfection
- 🍡 Cake Pops Made with Cake Mix – Party Perfect
13. Final Thoughts
This school cake isn’t just a recipe—it’s a time machine in sponge form. It’s for the days when you crave warmth, joy, and something unfussy but deeply satisfying. Whether you’re baking for a crowd or just for yourself, this sweet easy recipe is one that always delivers.
So grab your apron, preheat the oven, and relive the simple joy of a traybake that everyone loves—because some classics never go out of style.