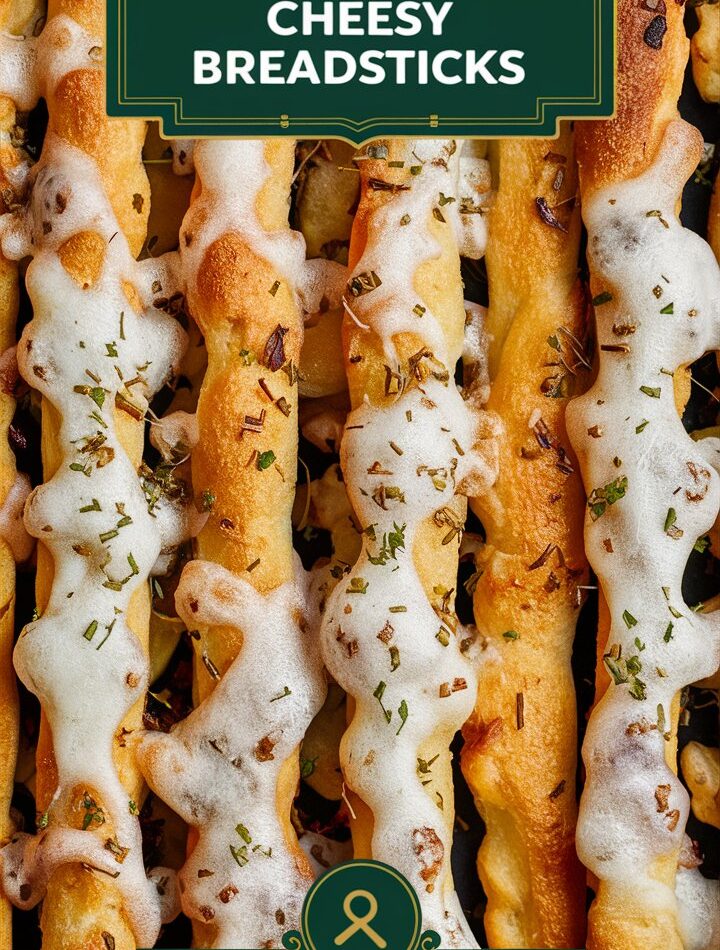
Cheesy breadsticks are a timeless comfort food, loved by kids and adults alike. Whether you’re hosting a cozy dinner, planning a pizza night, or simply craving a warm, cheesy snack, homemade cheesy breadsticks deliver buttery, melty goodness in every bite. In this comprehensive guide, we’ll explore everything you need to know—from making the perfect dough to serving, storing, and elevating your breadsticks for any occasion. By the end, you’ll have the confidence to create bakery-quality breadsticks right in your kitchen.
Why Homemade Cheesy Breadsticks Are a Must-Try
While store-bought or frozen breadsticks can be convenient, nothing compares to the flavor and texture of a freshly baked, homemade version. These breadsticks combine:
- Soft, pillowy dough that melts in your mouth.
- Golden, bubbly cheese on top for the ultimate comfort.
- Garlic butter finish that adds irresistible flavor.
- Versatility—serve as a side, appetizer, or snack.
Making them from scratch might sound intimidating, but with this step-by-step guide, even beginner bakers can achieve professional results.
Key Ingredients for Perfect Cheesy Breadsticks
The magic of cheesy breadsticks lies in the balance of dough, cheese, and seasonings. Here’s what you’ll need:
For the Dough:
- Active dry yeast: Helps the dough rise for a soft, airy texture.
- Warm water (around 110°F/43°C): Activates the yeast without killing it.
- Sugar: Feeds the yeast and adds slight sweetness.
- All-purpose flour: Forms the dough’s structure.
- Salt: Enhances flavor.
- Olive oil: Adds moisture and tenderness.
For the Topping:
- Shredded mozzarella: Classic choice for gooey meltiness.
- Cheddar, Gruyère, or Parmesan (optional): Adds flavor complexity.
- Butter: For brushing before and after baking.
- Garlic: Minced or powdered for that signature aroma.
- Italian seasoning: Herbs like oregano, basil, and thyme for depth.
- Optional extras: Red pepper flakes, parsley, or flaky sea salt for garnish.
Equipment You’ll Need
To make the process smooth and enjoyable, gather these tools:
- Large mixing bowl or stand mixer
- Wooden spoon or dough hook
- Rolling pin
- Baking sheet lined with parchment paper
- Pastry brush for butter and garlic
- Kitchen towel for covering dough
- Sharp knife or pizza cutter for slicing
Step-by-Step Guide to Making Cheesy Breadsticks
Follow these steps to ensure soft, golden, and cheesy perfection every time.
1. Activate the Yeast
In a large bowl, combine warm water, sugar, and yeast. Let it sit for 5–10 minutes until foamy. This step ensures your yeast is alive and ready to make the dough rise.
2. Prepare the Dough
Add flour, salt, and olive oil to the yeast mixture. Stir until a shaggy dough forms. Knead by hand for 5–7 minutes, or use a stand mixer with a dough hook until smooth and elastic.
3. Let the Dough Rise
Cover the bowl with a clean towel and leave it in a warm spot for 45–60 minutes, or until it doubles in size. Proper rising creates soft, airy breadsticks.
4. Shape the Breadsticks
Roll the dough into a rectangle (approximately 9×13 inches) on a floured surface. Transfer it to a parchment-lined baking sheet.
5. Add the Toppings
Brush melted butter over the dough. Sprinkle minced garlic, Italian seasoning, and shredded cheeses evenly. Optional: add red pepper flakes for a subtle kick.
6. Bake to Perfection
Preheat your oven to 425°F (220°C). Bake for 12–15 minutes, until the cheese is bubbling and edges are golden brown.
7. Final Touch
Brush with additional melted butter immediately after baking. Slice into sticks and serve warm with marinara, ranch, or garlic aioli.
Tips for Bakery-Quality Breadsticks
- Use fresh yeast: Expired yeast can prevent dough from rising properly.
- Don’t rush the rise: Patience ensures soft, pillowy breadsticks.
- Roll evenly: Uniform thickness ensures even baking.
- Extra cheese is better: Add a little more than you think—nobody complains about too much cheese!
- Optional garnish: Sprinkle chopped parsley or a pinch of Parmesan for a professional finish.
Ingredient Swaps and Flavor Variations
- Cheese options: Mix mozzarella with fontina, gouda, or provolone for unique flavors.
- Spicy breadsticks: Add jalapeños, red pepper flakes, or a dash of smoked paprika.
- Herbed variations: Rosemary, thyme, or chives can enhance the flavor profile.
- Quick shortcut: Use store-bought pizza dough if short on time.
Pairing Ideas: What to Serve with Cheesy Breadsticks
Cheesy breadsticks are versatile and complement many dishes:
- Dipping sauces: Marinara, garlic butter, ranch, or pesto.
- Soups: Tomato bisque, creamy chowders, or minestrone.
- Pasta dishes: Lasagna, fettuccine Alfredo, spaghetti with meatballs.
- Comfort food combos: Pair with Twice-Baked Sweet Potatoes or Pizza Monkey Bread for an indulgent spread.
Storage and Reheating
- Room temperature: Store in an airtight container for up to 2 days.
- Freezing: Bake, then wrap tightly in foil and freeze. Reheat in the oven at 350°F (175°C) for 10 minutes.
- Reheating tips: Brush with a little butter before reheating to restore softness.
Common Mistakes and How to Avoid Them
- Dough too dense: Make sure the yeast is active and let it rise fully.
- Cheese burning: Cover with foil if the bread bakes faster than the cheese melts.
- Breadsticks sticking to the pan: Use parchment paper or lightly grease the baking sheet.
- Breadsticks dry out: Don’t overbake; check a few minutes before the suggested baking time.
Dietary Adaptations
- Gluten-free: Use a 1:1 gluten-free flour blend. Dough may be slightly denser.
- Vegan: Replace butter with plant-based alternatives and use vegan cheese.
- Low-sodium: Reduce salt or use a low-sodium cheese option.
The Science Behind Perfect Cheesy Breadsticks
Understanding the chemistry can help improve your baking:
- Yeast fermentation produces carbon dioxide, which makes the dough rise and gives a soft texture.
- Fat in butter and oil tenderizes the dough by coating gluten strands.
- Cheese melts and browns due to Maillard reactions, creating flavor and aroma.
- Garlic and seasonings add aromatic compounds that enhance taste and depth.
Advanced Tips for Chefs and Enthusiasts
- Layering cheeses: Combine a mild mozzarella base with a sharper cheese top for extra flavor.
- Twisted breadsticks: Roll the dough into ropes, twist, and bake for a visually stunning presentation.
- Stuffed breadsticks: Insert a strip of cheese or pepperoni inside before baking.
- Crispier bottoms: Bake on a preheated pizza stone for extra crunch.
Creative Serving Ideas
- Cheesy Breadstick Sandwiches: Split baked breadsticks and fill with ham, turkey, or roasted vegetables.
- Breakfast twist: Top with scrambled eggs and bacon for a savory breakfast treat.
- Party platter: Serve with multiple dipping sauces in small bowls for entertaining.
- Gourmet touch: Drizzle with truffle oil or balsamic glaze for a restaurant-style presentation.
Frequently Asked Questions
Q: Can I make these ahead of time?
A: Absolutely! Prepare and refrigerate the dough overnight; bake fresh in the morning or evening.
Q: What cheese works best?
A: Mozzarella is classic. Add cheddar, Gruyère, or provolone for richer flavors.
Q: Can I freeze dough before baking?
A: Yes, wrap tightly in plastic and freeze. Thaw in the fridge overnight, then bake.
Q: Are these breadsticks healthy?
A: While indulgent, you can modify recipes with whole wheat flour, low-fat cheese, or plant-based alternatives.
Pairing with Drinks
- Non-alcoholic: Sparkling water with lemon, iced tea, or tomato juice.
- Alcoholic: Crisp white wine, light beer, or a refreshing spritzer.
Why This Recipe Works Better Than Store-Bought
- Customizable: Choose your cheese, seasonings, and spice level.
- Fresher: No preservatives or pre-packaged ingredients.
- Cost-effective: Cheaper than ordering from a pizzeria.
- Satisfying experience: Homemade baking provides a sense of accomplishment.
Final Thoughts
Homemade cheesy breadsticks are more than just a side dish—they’re a symbol of comfort, warmth, and togetherness. With this guide, you can confidently create soft, buttery, melty breadsticks from scratch, impressing family, friends, and even yourself. Remember, the secret is patience with the dough, generous cheese, and that irresistible garlic butter finish.
Bake a batch today, and watch them disappear faster than you can say “cheesy goodness.”
Related Recipes You’ll Love
- Pizza Monkey Bread – Gooey, cheesy, and perfect for sharing.
- Twice-Baked Sweet Potatoes – Sweet and savory side dish.
- Sun-Dried Tomato Grilled Cheese – Bold, melty, and flavorful.
Pin this recipe and tag your cheesy creations to share the joy! 🧀🥖