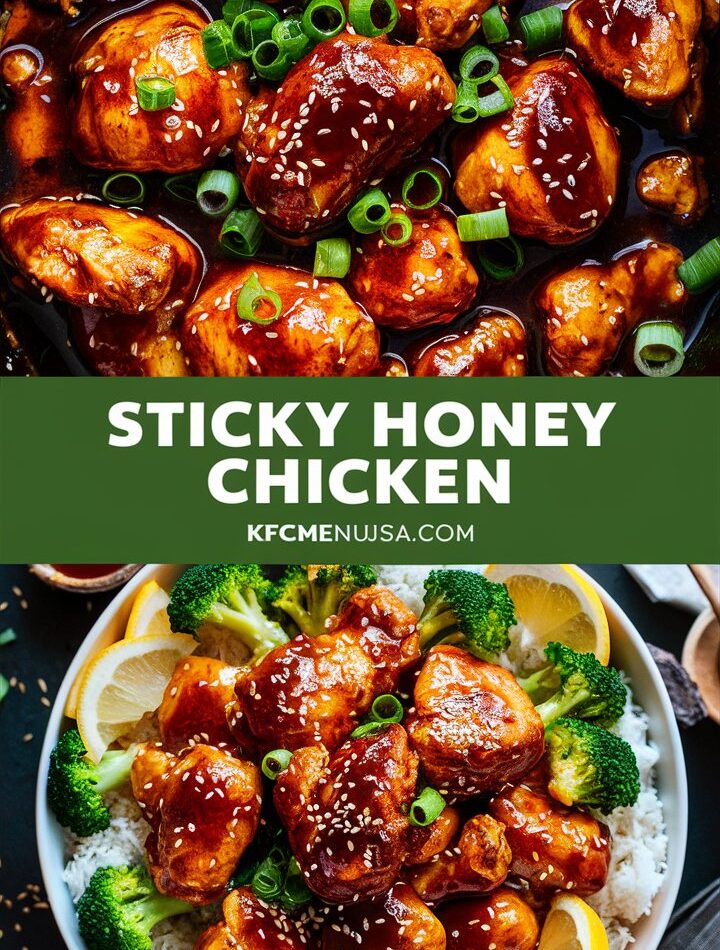
Crispy, saucy, sweet, and utterly irresistible—Sticky Honey Chicken is the kind of dinner that brings smiles to the table before the first bite. Whether you’re racing through a weeknight or hosting friends, this recipe is a total crowd-pleaser. Imagine golden, crunchy chicken bites tossed in a rich, glossy honey glaze with savory, garlicky undertones. It’s bold enough for adults, gentle enough for kids, and simple enough for even the busiest home cook.
Ready in just 30 minutes, this dish is a must-have in your easy chicken dinner rotation. In this in-depth guide, you’ll learn how to perfect every aspect of Sticky Honey Chicken—from prep to plating. Plus, we’ll cover make-ahead tips, storage, variations, and pro-level secrets to make your dish stand out.
2. Why This Sticky Honey Chicken Is So Popular
This recipe has all the hallmarks of a viral home-cooked classic:
✅ Simplicity
You don’t need a pantry full of hard-to-pronounce ingredients. The sauce is made with everyday staples like honey, soy sauce, and garlic powder.
✅ Speed
From start to finish, the recipe takes just 30 minutes. That includes frying, sauce-making, and serving.
✅ Flavor Explosion
Sticky, sweet, savory, and with a gentle kick of spice if you want it—each bite is pure joy.
✅ Kid-Approved & Family-Friendly
Kids love the crispy chicken and sweet glaze. Adults love the balance and umami depth.
✅ Better Than Takeout
You control the ingredients, the oil, the sweetness, and the sodium. Healthier, cleaner, and still packed with flavor.
3. Ingredients You’ll Need
Let’s break down each ingredient and why it matters:
🐔 Chicken Breasts or Thighs
Use boneless, skinless chicken cut into 1-inch cubes. Chicken breasts are lean and cook quickly, but thighs offer extra juiciness.
🌽 Cornstarch
Key to that ultra-crisp finish. It forms a light coating that turns golden and crunches beautifully after frying.
🥚 Eggs
Beaten eggs create a sticky layer that holds the cornstarch in place and helps the coating bind to the chicken.
🛢️ Oil for Frying
Use a neutral oil like vegetable, canola, or peanut oil. Make sure it’s hot enough (around 350°F or 175°C) for crispiness without greasiness.
🍯 Honey
This is where the “sticky” comes from. Use good-quality honey for best results—floral, raw, or mild varieties all work well.
🧂 Soy Sauce
Adds savory umami and saltiness. Choose low-sodium soy sauce if you’re watching your salt intake.
🍎 Apple Cider Vinegar
Brightens the flavor and cuts the sweetness. Don’t skip it—this is what gives the sauce that delicious balance.
🧄 Garlic Powder & Onion Powder
The dynamic duo of flavor boosters. They give the sauce depth without overpowering the honey.
🌶️ Red Pepper Flakes (Optional)
Adds a subtle heat. Adjust based on your family’s spice tolerance.
🌿 Green Onions & Sesame Seeds (for garnish)
They bring freshness, crunch, and visual appeal.
4. Step-by-Step Instructions
Here’s how to get it just right every time:
Step 1: Prepare the Chicken
- Cut the chicken into 1-inch cubes.
- Season with salt and pepper.
- Pat dry with paper towels—this helps the coating stick better and improves crispiness.
Step 2: Coat the Chicken
- Dip each piece in beaten egg.
- Roll it in cornstarch until fully coated. Shake off any excess.
Step 3: Fry the Chicken
- Heat 1/4 inch of oil in a skillet or wok over medium-high heat.
- Once the oil shimmers, add chicken pieces in batches.
- Fry for 3–4 minutes per side or until golden brown and cooked through.
- Remove and drain on paper towels.
Step 4: Make the Sticky Honey Sauce
In a saucepan, combine:
- 1/2 cup honey
- 1/4 cup soy sauce
- 1 tablespoon apple cider vinegar
- 1/2 teaspoon garlic powder
- 1/2 teaspoon onion powder
- 1/4 teaspoon red pepper flakes (optional)
Simmer for 3–5 minutes until slightly thickened.
Step 5: Toss Chicken in Sauce
- Return all the fried chicken to a clean skillet or wok.
- Pour the warm sauce over.
- Toss gently until every piece is well coated and glossy.
Step 6: Garnish and Serve
- Sprinkle with sesame seeds and sliced green onions.
- Serve hot with your favorite side.
5. Expert Tips for Crispy Chicken
- Don’t Overcrowd the Pan
Fry in batches. Overcrowding drops the oil temperature and leads to soggy results. - Use a Wire Rack
Instead of paper towels, cool fried chicken on a wire rack to keep the bottom crispy. - Preheat the Sauce Separately
Don’t fry chicken in the sauce—it makes it soggy. Toss it only after both are cooked. - Double-Coat for Extra Crunch
Dip in egg → cornstarch → egg → cornstarch again for an ultra-crispy finish. - Air Fryer Option
Spray coated chicken with oil and air fry at 375°F (190°C) for 12–15 minutes, flipping halfway through.
6. Variations and Customizations
🌶️ Spicy Sticky Chicken
Add sriracha, gochujang, or chili oil to the sauce.
🥦 Sticky Honey Chicken Stir-Fry
Add broccoli, bell peppers, snow peas, or carrots and stir-fry before adding the chicken.
🍗 Baked Version
Bake chicken at 425°F (220°C) for 20–25 minutes, flipping once. Then toss in sauce.
🌾 Gluten-Free Sticky Chicken
Use gluten-free soy sauce (tamari) and certified gluten-free cornstarch.
🐝 Sticky Lemon-Honey Chicken
Add 1 tablespoon of fresh lemon juice and zest for a citrus twist.
7. What to Serve with Sticky Honey Chicken
Sticky Honey Chicken pairs wonderfully with:
- Steamed white or jasmine rice
- Fried rice or egg noodles
- Roasted or stir-fried vegetables (e.g., broccoli, bok choy)
- Asian-style coleslaw or cucumber salad
- Sesame garlic green beans
8. Make-Ahead and Meal Prep Instructions
Planning ahead? Here’s how to do it right:
- Fry and cool the chicken, then store in an airtight container for up to 2 days.
- Sauce can be made ahead and refrigerated in a jar.
- Reheat chicken in an air fryer for 4–5 minutes at 375°F for that crispy texture.
- Heat the sauce gently in a saucepan, then toss everything together before serving.
9. Storing and Reheating Sticky Chicken
✅ Refrigeration
- Store leftovers in a sealed container for up to 4 days.
- Reheat in a skillet or oven to maintain crispiness.
❄️ Freezing
- Freeze coated (but not sauced) chicken pieces on a tray.
- Once solid, transfer to a ziplock bag for up to 2 months.
- To use: Air fry or oven-bake directly from frozen, then toss in warm sauce.
10. Frequently Asked Questions (FAQ)
❓ Can I use chicken thighs instead of breasts?
Yes! Chicken thighs are juicier and more forgiving. Just ensure they’re boneless and cut into bite-sized pieces.
❓ Is this recipe gluten-free?
Not by default, but it can be made gluten-free by using tamari and GF cornstarch.
❓ Can I use maple syrup instead of honey?
Yes, but it will change the flavor slightly. Honey provides a thicker, more classic glaze.
❓ Can I bake the chicken instead of frying?
Absolutely. Baking at high heat (425°F) with a light coating of oil works well. It’s a healthier option too.
❓ How spicy is the dish?
Mild by default. The red pepper flakes are optional and adjustable.
11. Sticky Honey Chicken Recipe Card
Sticky Honey Chicken – Easy Chicken Recipes Everyone Will Love
| Prep Time | Cook Time | Total Time | Servings |
|---|---|---|---|
| 10 minutes | 20 minutes | 30 minutes | 4 servings |
Ingredients
- 2 boneless, skinless chicken breasts, cubed
- Salt & pepper, to taste
- 1/2 cup cornstarch
- 2 large eggs, beaten
- 1/4 cup vegetable oil
- 1/2 cup honey
- 1/4 cup soy sauce
- 1 tbsp apple cider vinegar
- 1/2 tsp garlic powder
- 1/2 tsp onion powder
- 1/4 tsp crushed red pepper flakes (optional)
- Sesame seeds + green onions for garnish
Instructions
- Season chicken with salt and pepper. Pat dry.
- Coat in egg, then cornstarch.
- Fry until golden and crispy. Drain.
- Simmer sauce ingredients in saucepan.
- Toss chicken in sauce until well coated.
- Garnish and serve immediately.
12. Nutrition Information (Per Serving)
| Calories | Protein | Carbs | Sugars | Fat | Saturated Fat | Sodium |
|---|---|---|---|---|---|---|
| 490 kcal | 32g | 34g | 20g | 25g | 4g | 780mg |