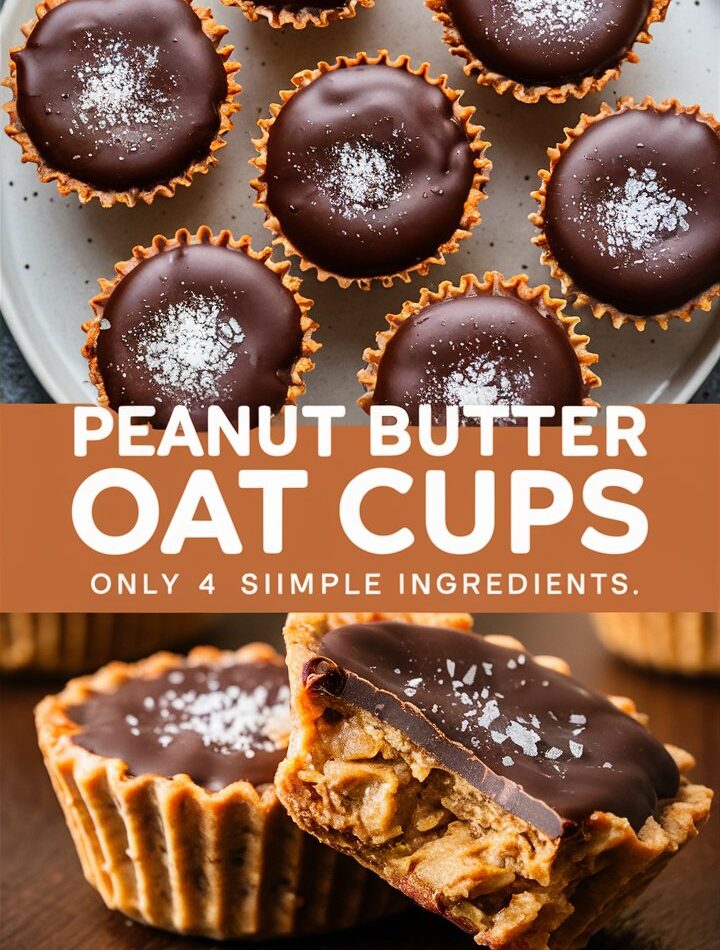
There are moments in every kitchen where simplicity is the ultimate craving. Maybe it’s a sweltering summer afternoon when turning on the oven feels like a betrayal, or maybe it’s a late-night sweet tooth calling for something rich, chewy, and comforting—but without the mess. That’s where No-Bake Peanut Butter Oat Cups come in.
These chewy, chocolate-topped delights are a celebration of sweet easy recipes—recipes that rely on pantry staples, skip the oven, and deliver maximum reward with minimal effort. If you’ve ever looked up “how to make desserts without baking” or “easy peanut butter snacks,” you’re in exactly the right place.
In this guide, you’ll get everything from the detailed recipe and storage tips to variations, FAQs, and nutrition insights. It’s time to upgrade your snack game without breaking a sweat.
1. Why You’ll Love These No-Bake Peanut Butter Oat Cups
Let’s be honest—life is chaotic. Between busy workdays, last-minute family dinners, and that unexpected craving for something sweet around 9:37 p.m., having a go-to snack recipe you can make in under 15 minutes is a gift.
Here’s why these peanut butter oat cups deserve a permanent spot in your recipe collection:
✅ No oven needed – Zero baking. Zero preheating.
✅ Only 7 ingredients – And they’re all pantry staples.
✅ Freezer-friendly – Make them ahead and store for weeks.
✅ Customizable – Swap in almond butter, add protein, or go vegan.
✅ Kid and adult-approved – Chewy, chocolatey, and craveable.
These cups are the answer to everything from after-school snacks to midnight treats. Whether you’re looking for something healthy-ish or a quick dessert fix, they strike the perfect balance.
2. Ingredients That Keep It Simple
Every ingredient in this recipe serves a purpose—no fluff, no fillers. Let’s break them down:
🥜 Peanut Butter (1 cup)
Choose creamy, unsweetened peanut butter. It acts as the base and binds the oats while giving that rich, nutty flavor. Natural peanut butter works best for texture and taste.
🥥 Coconut Oil (½ cup)
Used to help the mixture set when chilled. It also adds a slight tropical note that complements the chocolate and peanut butter.
🍯 Honey or Maple Syrup (¼ cup)
Both sweeten the oat cups naturally. Honey gives a thicker consistency, while maple syrup offers a vegan alternative with a slightly richer flavor.
🌾 Quick Oats (1½ cups)
They soak up the wet ingredients perfectly. Avoid steel-cut or old-fashioned oats—they don’t bind as well in no-bake recipes.
🧂 Sea Salt (¼ tsp)
A pinch goes a long way. It balances the sweetness and enhances all the other flavors.
🍨 Vanilla Extract (½ tsp)
Rounding out the flavor profile, vanilla adds depth and a subtle aroma.
🍫 Dark Chocolate Chips (½ cup)
Melted and layered on top for that rich, snappy bite once chilled. You can also use milk chocolate or vegan chocolate, depending on your preference.
3. Step-by-Step: How to Make No-Bake Peanut Butter Oat Cups
Here’s how to bring this no-bake magic to life:
🔥 Step 1: Melt Wet Ingredients
In a saucepan over low heat, combine peanut butter, coconut oil, and honey. Stir continuously until everything melts into a smooth, glossy mixture. Avoid overheating.
🌿 Step 2: Add Dry Ingredients
Remove from heat. Stir in vanilla extract, sea salt, and quick oats. Mix until oats are fully coated.
🧁 Step 3: Scoop into Muffin Tin
Line a muffin tin with paper or silicone liners. Scoop about 2 tablespoons of the mixture into each cup, pressing down lightly with the back of a spoon.
🍫 Step 4: Add Melted Chocolate
Melt chocolate chips in the microwave (15-second intervals) or use a double boiler. Spoon about 1 teaspoon of melted chocolate over each oat cup and spread it gently.
❄️ Step 5: Freeze
Place the muffin tin in the freezer for at least 30 minutes or until fully set.
🍪 Step 6: Store and Enjoy
Once firm, pop the oat cups out of the liners and store in an airtight container in the freezer or fridge.
4. Pro Tips for the Perfect Batch
✔ Use natural peanut butter: It stirs easier and blends more smoothly than brands with added sugar or hydrogenated oils.
✔ Don’t overheat the mixture: This can cause separation or burning. Low heat is your best friend.
✔ Use a silicone muffin tray: This makes removal a breeze.
✔ Add toppings: Sprinkle with crushed peanuts, shredded coconut, or flaky salt before freezing for a gourmet look.
✔ Make them mini: Use a mini muffin pan for bite-sized portions.
5. Flavor Variations to Try
Want to mix things up? Here are delicious ways to adapt the base recipe:
🔄 Nut Butters
- Almond butter
- Cashew butter
- Sunflower seed butter (nut-free)
🍫 Toppings & Mix-ins
- Chopped nuts
- Coconut flakes
- Crushed pretzels
- Dried cranberries
- Mini chocolate chips (mixed in before setting)
💪 Protein Boost
Add 1 scoop of vanilla or chocolate protein powder during the oat-mixing step for a post-workout snack.
🌱 Vegan Option
Use maple syrup instead of honey and dairy-free chocolate chips.
6. Make-Ahead & Storage Instructions
One of the best things about this recipe is how freezer-friendly it is.
❄️ Freezer:
Store in an airtight container for up to 1 month. Layer with parchment to prevent sticking.
🧊 Fridge:
If you prefer softer texture, keep them in the fridge. They’ll stay fresh for about 10 days.
🥡 On the Go:
Wrap individual cups in parchment or use snack-sized containers. Perfect for lunchboxes, office drawers, or road trips.
7. When to Serve These No-Bake Cups
These cups are incredibly versatile. Here’s when to enjoy them:
- Mid-morning energy boost
- Post-dinner dessert
- Back-to-school snack
- Potluck or party bites
- Road trip treats
- Holiday goodie bags (wrap them individually)
They’re the snack that’s welcome at any time of day.
8. Nutrition Breakdown (Per Cup)
| Nutrient | Amount |
|---|---|
| Calories | 210 |
| Protein | 5g |
| Carbohydrates | 16g |
| Sugar | 7g |
| Fat | 14g |
| Saturated Fat | 5g |
| Fiber | 2g |
| Sodium | 45mg |
| Cholesterol | 0mg |
🥗 Health Note:
Thanks to the healthy fats and oats, these cups provide sustained energy. They’re a smart swap for processed snacks or sugary desserts.
9. Frequently Asked Questions (FAQs)
❓Can I make these without coconut oil?
Yes, but you’ll need another fat to help them firm up—try unsalted butter or vegan margarine.
❓Can I use old-fashioned oats?
It’s not recommended. They won’t absorb the mixture as well and can make the cups fall apart.
❓Are they gluten-free?
If you use certified gluten-free oats and chocolate, yes!
❓Can I double the recipe?
Absolutely. Just use a larger bowl and an extra muffin tray.
❓How long do they last?
Up to 10 days in the fridge or 1 month in the freezer.
10. More Sweet Easy Recipes You’ll Love
Looking for more no-fuss dessert inspiration? Try these next:
- No-Bake Chocolate Eclair Cake – Layers of graham crackers, pudding, and chocolate.
- Apple Crisp Bars – A warm fall favorite turned into snack bars.
- No-Bake Chocolate Chip Cheesecake – Silky, sweet, and made without an oven.
11. Final Thoughts
No-bake peanut butter oat cups are more than just a snack—they’re a solution. A sweet, simple, satisfying answer to the everyday question: What can I make quickly that’s actually good?
They’re freezer-ready, crowd-pleasing, and endlessly customizable. Whether you’re a peanut butter devotee or just looking for a fun new treat to try with your kids, this is one recipe that’ll keep making its way back into your routine.
And the best part? You don’t even have to turn on the oven.
12. 📌 Full Printable Recipe
No-Bake Peanut Butter Oat Cups
Prep Time: 10 minutes
Total Time: 10 minutes
Yield: 12 cups
Course: Snack, Dessert
Cuisine: American
Author: Elena | Sweet Easy Recipes
Ingredients:
- 1 cup creamy peanut butter
- ½ cup coconut oil
- ¼ cup honey or maple syrup
- 1½ cups quick oats
- ¼ tsp sea salt
- ½ tsp vanilla extract
- ½ cup dark chocolate chips
Instructions:
- In a saucepan over low heat, melt the peanut butter, coconut oil, and honey until smooth.
- Remove from heat. Stir in vanilla, salt, and oats until well mixed.
- Scoop into muffin liners and press down gently.
- Melt chocolate and spoon over each cup.
- Freeze for at least 30 minutes until firm.
- Store in fridge or freezer and enjoy cold.