You know those days when you crave something chocolatey, comforting, and indulgent—but you look in your fridge and realize you’re out of buttermilk? That’s where this easy homemade chocolate cake without buttermilk saves the day.
Forget the complicated steps, expensive ingredients, or fancy kitchen gadgets. This recipe delivers a moist, tender, and intensely chocolate-flavored cake using just basic pantry ingredients like flour, sugar, eggs, cocoa, and oil.
Whether you’re baking for a birthday, a last-minute get-together, or a “treat-yourself” kind of night, this cake rises to the occasion—literally and figuratively.
2. Why You’ll Love This Chocolate Cake
- ✅ No Buttermilk Needed – Uses regular milk or a dairy-free option.
- ✅ Beginner-Friendly – No mixer or baking experience required.
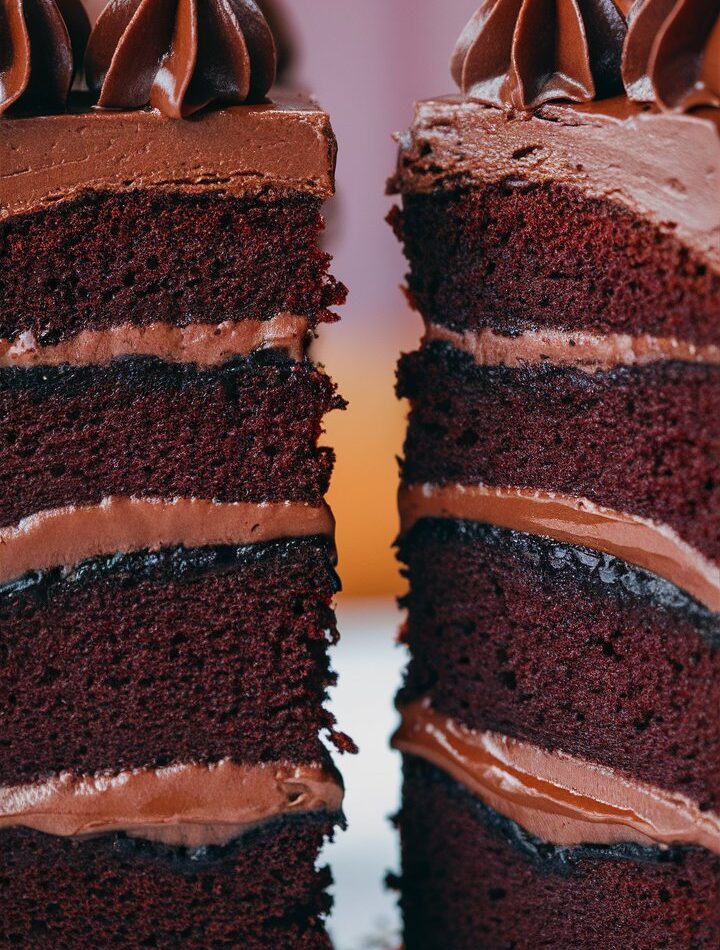
- ✅ Rich Flavor, Soft Crumb – Thanks to cocoa, oil, and boiling water.
- ✅ Versatile Base – Add nuts, fruit, or different frostings.
- ✅ Quick Prep – Just 15 minutes to get into the oven.
- ✅ Budget-Friendly – Uses everyday ingredients already in your kitchen.
This is the kind of cake that doesn’t ask much from you—but delivers everything you want.
3. Ingredients You Already Have
Here’s what you’ll need to create chocolate magic from scratch:
| Ingredient | Why It’s Important |
|---|---|
| Granulated Sugar (2 cups) | Sweetens and helps keep the crumb soft. |
| All-Purpose Flour (1¾ cups) | Provides structure and tenderness. |
| Unsweetened Cocoa Powder (¾ cup) | The heart of the chocolate flavor. Use natural or Dutch-process. |
| Baking Powder (1½ tsp) | Works with baking soda to help the cake rise. |
| Baking Soda (1½ tsp) | Reacts with cocoa and milk for light texture. |
| Salt (1 tsp) | Balances the sweetness and enhances cocoa. |
| Eggs (2 large) | Add richness and bind the batter. |
| Milk (1 cup) | Adds moisture and replaces buttermilk. Any dairy or non-dairy milk works. |
| Vegetable Oil (½ cup) | Gives a tender crumb and moist texture. |
| Vanilla Extract (2 tsp) | Adds warm depth and rounds out the chocolate flavor. |
| Boiling Water (1 cup) | Thins the batter and helps bloom the cocoa for intense flavor. |
4. Step-by-Step Instructions
Step 1: Prep Your Pans
- Preheat oven to 350°F (175°C).
- Grease two 9-inch round cake pans (or one 9×13 pan).
- Dust with flour or line with parchment paper.
Step 2: Combine Dry Ingredients
In a large bowl, whisk together:
- 2 cups sugar
- 1¾ cups flour
- ¾ cup cocoa powder
- 1½ tsp baking powder
- 1½ tsp baking soda
- 1 tsp salt
Step 3: Mix in the Wet Ingredients
Add to the bowl:
- 2 eggs
- 1 cup milk
- ½ cup oil
- 2 tsp vanilla
Stir gently until the batter is thick and glossy.
Step 4: Add the Boiling Water
Carefully stir in 1 cup of boiling water. Batter will look thin—don’t worry! This helps create a super moist cake.
Step 5: Bake
- Pour the batter into your pans.
- Bake for 30–35 minutes, or until a toothpick comes out clean.
- Cool for 10 minutes in the pans, then transfer to wire racks to cool completely.
Step 6: Frost and Serve
Once cooled, frost as desired. Or eat it plain—yes, it’s that good.
5. Frosting Ideas (Simple to Decadent)
Classic Chocolate Buttercream
- 1 cup butter
- 3½ cups powdered sugar
- ½ cup cocoa powder
- ¼ cup milk
- 1 tsp vanilla
Beat until smooth and creamy.
Ganache Glaze (2-Ingredient!)
- 1 cup heavy cream
- 8 oz dark chocolate, chopped
Heat cream, pour over chocolate, stir until glossy.
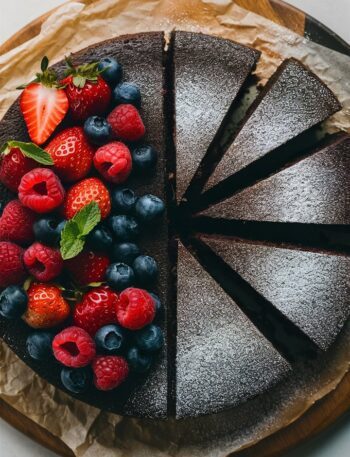
Whipped Cream + Berries
Perfect for a lighter topping.
6. Variations to Try
- 🍫 Double Chocolate: Stir in chocolate chips before baking.
- ☕ Mocha Cake: Add 1 tsp instant coffee to the batter.
- 🌶️ Mexican Hot Chocolate Cake: Add a pinch of cinnamon and cayenne.
- 🥥 Coconut Milk Cake: Use canned coconut milk instead of dairy.
- 🍊 Orange Chocolate: Zest one orange and stir into the batter.
7. Tips for Perfect Texture Every Time
- Don’t Overmix – Stop mixing as soon as the batter is smooth.
- Use Boiling Water – It helps develop deep cocoa flavor and creates tenderness.
- Cool Before Frosting – Rushing this step makes the frosting melt or slide.
- Room Temperature Eggs – Help blend everything smoothly.
- Measure Flour Correctly – Scoop and level with a knife. Don’t pack it in!
8. Make-Ahead & Storage Guide
To Make Ahead:
- Bake cake layers, cool completely, wrap in plastic, and refrigerate up to 2 days or freeze for 1 month.
- You can also prepare frosting in advance and store it in the fridge for up to 5 days.
To Store Leftovers:
- Wrap slices or store in an airtight container in the fridge.
- Keeps fresh for 5–6 days.
- Want to freeze? Wrap slices tightly and freeze up to 2 months.
9. Frequently Asked Questions
Q: Can I use almond milk or oat milk instead of dairy milk?
A: Yes! Any unsweetened non-dairy milk will work just fine.
Q: What if I only have one cake pan?
A: Bake one layer at a time or use a 9×13 pan and adjust baking time slightly.
Q: Can I make cupcakes with this batter?
A: Absolutely. Bake at 350°F for 18–22 minutes. Makes 24 cupcakes.
Q: Is the cake too sweet?
A: Not at all. It’s rich but balanced. You can reduce sugar by ¼ cup if needed.
Q: How do I make it gluten-free?
A: Use a 1:1 gluten-free baking flour. Results may vary slightly in texture.
10. Nutrition Info (Per Slice)
| Nutrient | Amount |
|---|---|
| Calories | 350 kcal |
| Carbs | 50 g |
| Sugar | 35 g |
| Fat | 15 g |
| Saturated Fat | 3.5 g |
| Protein | 4 g |
| Sodium | 370 mg |
| Fiber | 3 g |
Based on 12 servings. Values are estimates.
11. Final Thoughts
This easy homemade chocolate cake recipe is a game-changer. It proves that you don’t need special ingredients like buttermilk or sour cream to create a rich, moist, bakery-quality cake at home. Whether you’re a beginner or a seasoned baker, this cake never fails.
It’s quick, forgiving, deeply chocolatey, and versatile. You can dress it up with frosting and toppings or enjoy it plain with a cup of coffee. Either way, it’s going to win hearts.