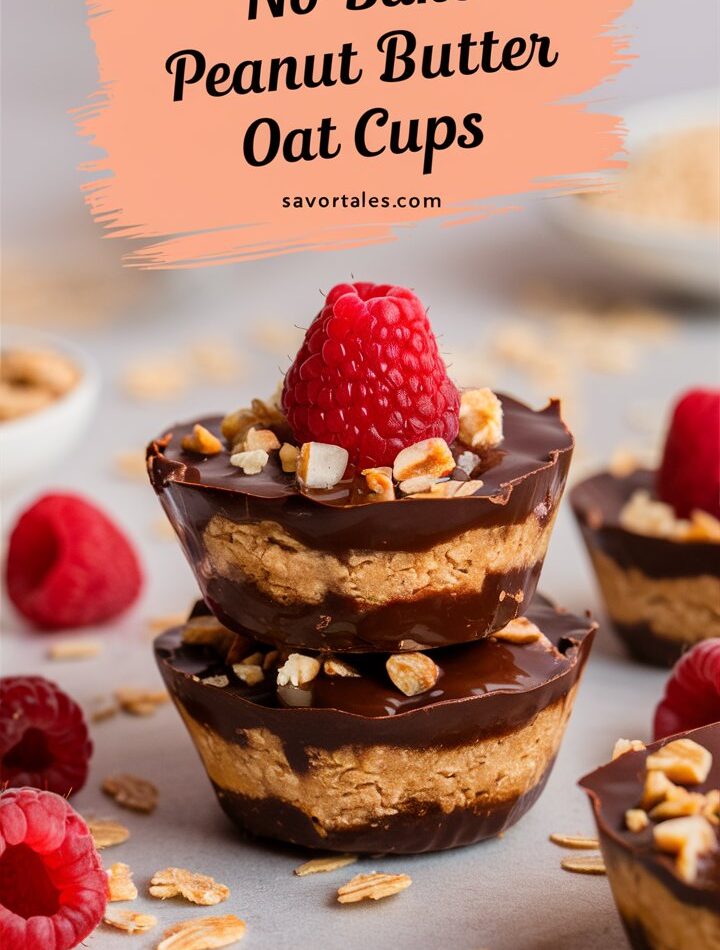
There’s something magical about chocolate, oats, and peanut butter all coming together—especially when it doesn’t require an oven. These no-bake chocolate oatmeal peanut butter cups hit every note: chewy, sweet, nutty, and satisfyingly rich. Whether you’re a busy parent, a college student, or just someone with a spontaneous sweet tooth, this recipe will earn a permanent spot in your kitchen rotation.
Gone are the days when dessert prep meant long hours, hot kitchens, or complicated techniques. These treats come together in just 15 minutes and require basic pantry ingredients—no baking, no fuss, and absolutely no compromise on flavor or texture.
💖 2. Why You’ll Love These No-Bake Cups
Here’s why this recipe is a keeper:
- No oven required — perfect for summer days.
- Fast prep — done in under 15 minutes.
- Pantry-friendly — uses everyday ingredients.
- Kid-approved — chewy, fun, and mess-free.
- Versatile — easily customizable (vegan, gluten-free, nut-free).
- Portable — ideal for lunchboxes, parties, or on-the-go snacking.
These cups live somewhere between a granola bar, a candy bite, and a homemade dessert, making them the sweet spot (literally) of easy recipe creations.
🧂 3. Ingredients Breakdown and Substitutions
Each ingredient plays a specific role. Here’s what you’ll need and how to substitute if needed:
🧈 Butter (½ cup)
Adds richness and helps the cups firm up.
✅ Substitute: Vegan butter or coconut oil.
🧁 Granulated Sugar (2 cups)
Provides sweetness and structure.
✅ Substitute: Coconut sugar, maple syrup (reduce liquid).
🥛 Milk (½ cup)
Binds the ingredients together and enhances texture.
✅ Substitute: Almond, oat, soy, or coconut milk.
🍫 Unsweetened Cocoa Powder (4 tbsp)
Delivers deep, rich chocolate flavor.
✅ Substitute: Cacao powder (for a healthier version).
🥜 Peanut Butter (½ cup)
The creamy base and nutty flavor powerhouse.
✅ Substitute: Almond butter, sunflower seed butter (for nut-free option).
🌾 Quick Oats (3 cups)
Creates structure and chewiness.
✅ Important: Do NOT use old-fashioned or steel-cut oats.
🍦 Vanilla Extract (1 tsp)
Adds aroma and rounds out sweetness.
✅ Optional: Can be skipped, but recommended.
🍳 4. Step-by-Step Recipe Instructions
Follow these steps carefully, and you’ll be enjoying these chewy cups in no time:
Step 1: Melt the Butter
Use a medium saucepan. Heat butter on medium until fully melted—about 2 minutes.
Step 2: Add Sugar, Milk & Cocoa
Add sugar, milk, and cocoa powder. Stir continuously. Once fully mixed, bring to a gentle rolling boil and let it bubble for 1 minute only. Do not overboil—this is crucial for consistency.
Step 3: Remove from Heat & Stir in Peanut Butter
Take the pot off the heat. Immediately stir in the peanut butter until melted and smooth.
Step 4: Add Oats & Vanilla
Fold in oats and vanilla. Stir until everything is well combined and thick. Mixture should still be scoopable.
Step 5: Scoop & Shape
Spoon into silicone muffin cups or lined cupcake trays. Gently press down to shape.
Step 6: Chill
Refrigerate for at least 30 minutes. The longer, the firmer. They’ll be chewy but hold their shape perfectly.
🎨 5. Texture, Flavor & Presentation Tips
- Want them softer? Use a little more milk.
- Want a firmer bite? Add a tablespoon more oats.
- For presentation: Top with a drizzle of melted chocolate or a pinch of sea salt.
- Mini version: Use mini muffin trays for bite-sized portions.
🔄 6. Customization Ideas
Want to make this recipe suit every dietary need? Here’s how:
✅ Vegan
- Use plant-based butter.
- Replace milk with almond or soy milk.
✅ Gluten-Free
- Make sure to use certified gluten-free oats.
✅ Nut-Free
- Use sunflower seed butter instead of peanut butter.
✅ Low-Sugar
- Use monk fruit sweetener or erythritol.
- Reduce cocoa and increase oats slightly for balance.
⚠️ 7. Common Mistakes to Avoid
- Skipping the boil step: Without this, the sugar won’t dissolve properly.
- Using the wrong oats: Only use quick oats—old-fashioned oats will make the texture crumbly.
- Over-chilling: If left in the fridge too long without covering, they can dry out.
- Too much oil from nut butter: Stir your nut butter before measuring to avoid oil pooling.
🕒 8. Make-Ahead, Storage & Freezing Guide
🧊 Fridge
Store in an airtight container for up to 7 days. Add parchment between layers to prevent sticking.
❄️ Freezer
Wrap each cup individually, then place in a freezer-safe bag. Keeps well for up to 2 months.
✅ Tip: No need to thaw—some people love them frozen!
❓ 9. FAQs About No-Bake Oatmeal Peanut Butter Cups
Q: Can I microwave the mixture instead of using the stove?
A: Yes—but monitor closely. Heat butter, sugar, milk, and cocoa in 30-second intervals.
Q: Can I double the batch?
A: Absolutely! Just use a larger pot and work quickly once you add the oats.
Q: Can I add chocolate chips?
A: Yes, but wait until the mixture cools slightly or they will melt completely.
🎉 10. Fun Serving Ideas
- Party platter: Serve with mini forks or skewers.
- Lunchbox treat: Wrap in wax paper for a no-mess dessert.
- Midnight snack: Keep a stash in the freezer for late-night cravings.
- Holiday twist: Add crushed peppermint or holiday sprinkles.
🥗 11. Healthier Alternatives & Nutrition Insight
While not exactly a “health food,” these cups offer a more wholesome treat compared to store-bought candy bars. Here’s how to level it up:
- Add-ins: Chia seeds, flaxseed, or protein powder.
- Reduce sugar: Try halving the sugar and adding more peanut butter or oats.
- Use dark cocoa: Higher in antioxidants.
🍪 12. Comparisons: Are They Healthier than Cookies?
| Feature | Cookies | These Cups |
|---|---|---|
| Oven required | ✅ | ❌ |
| Prep time | 30+ mins | 15 mins |
| Ingredients | Often includes eggs, flour | Pantry staples |
| Storage | 2-3 days | Up to 7 days |
| Customizable | Moderate | Highly customizable |
Verdict: These cups win for ease, flexibility, and no-fuss snacking.
💬 13. Reader Stories & Use Cases
- “These were a hit at my daughter’s bake sale!”
- “I packed them for my camping trip—perfect energy bites.”
- “Made a batch at midnight. Zero regrets.”
Got your own twist? Comment below with how you made them your own!
🔍 14. Why This Recipe Works Every Time
- Scientifically balanced ratio of wet to dry ingredients.
- Simple method with a single boiling step.
- Ingredient flexibility makes it foolproof.
- Chilling locks in texture without drying out.
✅ 15. Final Thoughts
This recipe isn’t just a dessert—it’s a stress-free, joy-inducing bite of goodness. You’ll make it once and keep making it because it’s that reliable, customizable, and delicious. Whether you’re hosting a party or soothing your afternoon cravings, these no-bake chocolate oatmeal peanut butter cups deliver every time.
📝 16. Full Recipe Card
Prep Time: 10 mins
Cook Time: 5 mins
Chill Time: 30 mins
Total Time: 45 mins
Servings: 12 cups
Ingredients:
- ½ cup unsalted butter
- 2 cups granulated sugar
- ½ cup milk
- 4 tbsp unsweetened cocoa powder
- ½ cup peanut butter
- 3 cups quick oats
- 1 tsp vanilla extract
Instructions:
- Melt butter in a saucepan over medium heat.
- Stir in sugar, milk, and cocoa. Boil for 1 minute.
- Remove from heat. Stir in peanut butter.
- Add oats and vanilla. Mix thoroughly.
- Spoon into liners or silicone molds.
- Chill for 30 minutes. Enjoy!
🍽️ 17. Nutrition Table (Per Cup)
| Nutrient | Amount |
|---|---|
| Calories | 240 |
| Sugar | 22 g |
| Total Fat | 12 g |
| Saturated Fat | 5 g |
| Carbohydrates | 31 g |
| Fiber | 2 g |
| Protein | 4 g |
| Cholesterol | 15 mg |
| Sodium | 45 mg |